入門~Bootstrap5のbuttonについて【コードサンプルあり】│福岡・関東・名古屋対応のホームページ制作会社|安い料金で提供「I.M.WORKS」
070-2017-3870 無料相談・お見積り- 福岡・関東・名古屋対応のホームページ制作会社|安い料金で提供「I.M.WORKS」
- 開発者ブログ
- Webデザイン
- 入門~Bootstrap5のbuttonについて【コードサンプルあり】
入門~Bootstrap5のbuttonについて【コードサンプルあり】
こんにちは。
本日はBootstrap5のbuttonについて詳しく解説します!
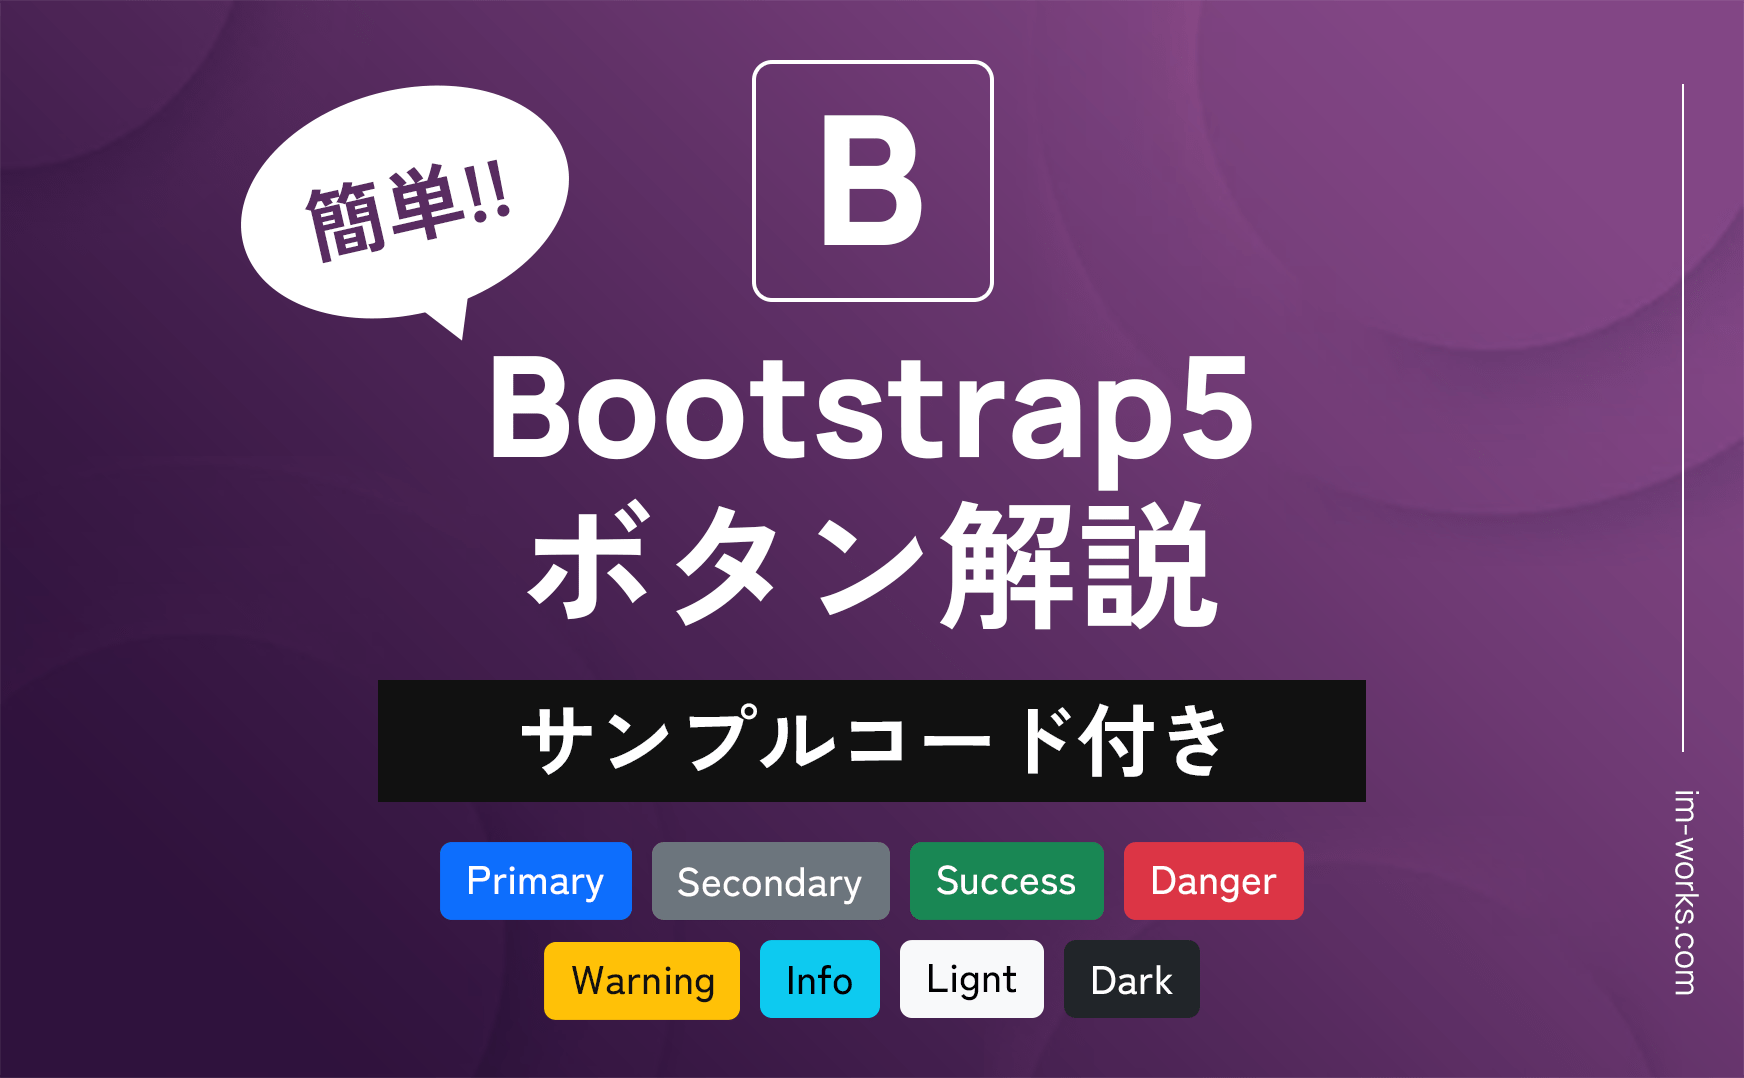
Bootstrap5では、予めbuttonのスタイルが用意されています。
ボタンはフォームやダイアログなどのアクションにカスタムボタンスタイルを利用できます。
サイズや状態管理に対応しています。ボタンの使い方をコード付きで解説します!
それでは行きましょう。
目次
Bootstrap5の読み込み
まずは、Bootstrap5 を扱えるようにするため、Bootstrap5をHTMLに読み込んでいきましょう。
Bootstrap5は予めCDNなどで用意されています。
インストール方法は、コマンド、CDN、自サーバーにダウンロードするなど方法は様々ですが、
今回はBootstrap公式のCDN「jsDelivr」から読み込んでいきます。
<!-- Bootstrap CSS -->
<link href="https://cdn.jsdelivr.net/npm/bootstrap@5.3.0/dist/css/bootstrap.min.css" rel="stylesheet">

<!-- Bootstrap JS Bundle (Popper.jsも含まれています) -->
<script src="https://cdn.jsdelivr.net/npm/bootstrap@5.3.0/dist/js/bootstrap.bundle.min.js"></script>Bootstrap5には予めbuttonの基本的な.btnクラスが用意されています。
.btnは、ボタンバリエーションと組み合わせて使用したり、独自のカスタムスタイルのベースとして使用することを目的としています。
<button type="button" class="btn">Base class</button>.btnには、以下のCSSが設定されています。
.btn {
  display: inline-block;
  font-weight: 400;
  text-align: center;
  text-decoration: none;
  vertical-align: middle;
  user-select: none;
  background-color: #0d6efd;
  border: 1px solid #0d6efd;
  border-radius: 0.375rem;
  padding: 0.375rem 0.75rem;
  font-size: 1rem;
  line-height: 1.5;
  color: #fff;
  transition: background-color 0.15s ease-in-out, border-color 0.15s ease-in-out, box-shadow 0.15s ease-in-out;
}
バリエーション
Bootstrapにはいくつかのボタンバリエーションがあり、各ボタンはそれぞれの意味的な役割を果たし、さらにコントロールのためにいくつかの追加要素があります。
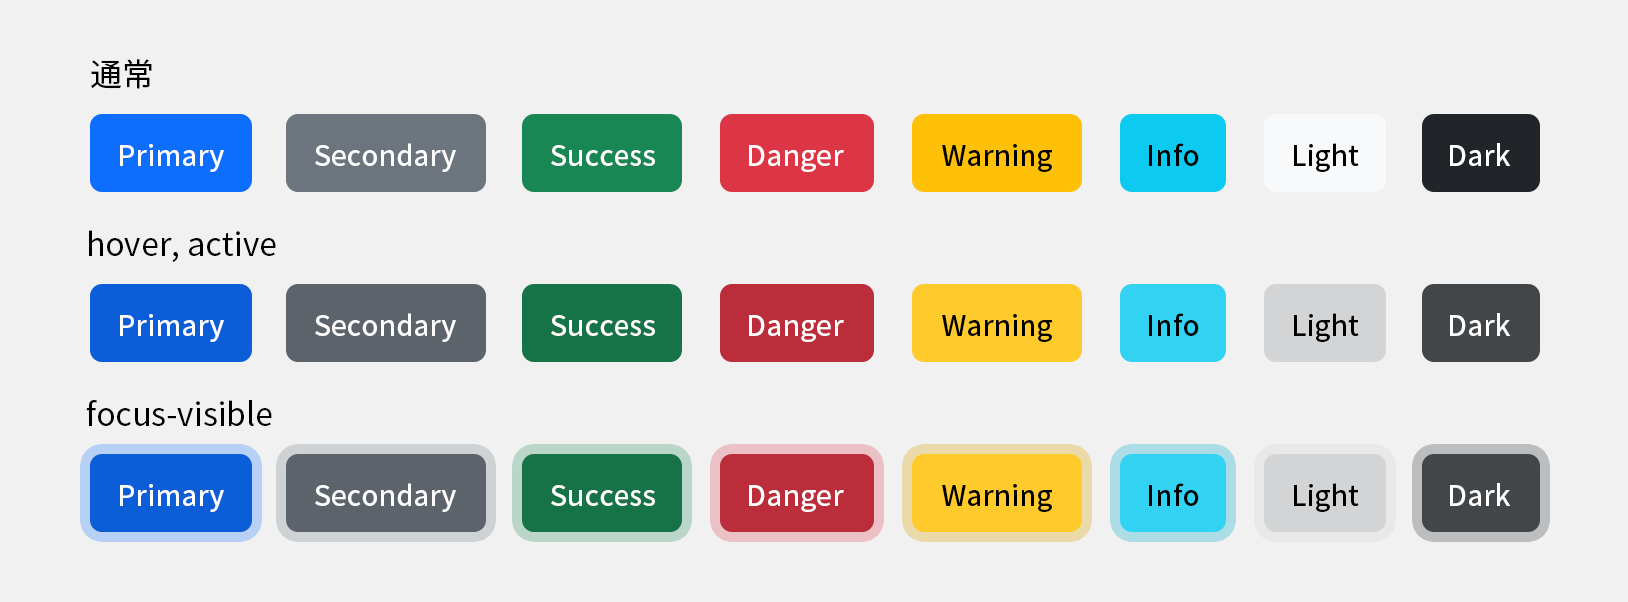
<button type="button" class="btn btn-primary">Primary</button>
<button type="button" class="btn btn-secondary">Secondary</button>
<button type="button" class="btn btn-success">Success</button>
<button type="button" class="btn btn-danger">Danger</button>
<button type="button" class="btn btn-warning">Warning</button>
<button type="button" class="btn btn-info">Info</button>
<button type="button" class="btn btn-light">Light</button>
<button type="button" class="btn btn-dark">Dark</button>

<button type="button" class="btn btn-link">Link</button>要約すると、「. btn-successや.btn-dangerなどのクラス名は、視覚的効果を提供するもので、スクリーンリーダーなどの支援技術利用者にはbuttonの意味は伝わりません。.visually-hiddenなどを用いて別の手段で伝える必要があります。」という事なので、サンプルを用意しました。
.visually-hiddenサンプル
「新しいメッセージが」の箇所に注目して、「visually-hiddenサンプル」をご確認ください。
<button class="btn btn-primary">
  <span class="visually-hidden">新しいメッセージが</span>3件あります
</button>テキスト折り返しの無効化
buttonの中のテキストを折り返したくない場合は.text-nowrapが使えます。
<button type="button" class="btn text-nowrap">Base class</button>.text-nowrapのCSSは以下が設定されています。
.text-nowrap {
  white-space: nowrap !important;
}ちなみに、この.text-nowrapは、button以外にもテキストやリンクなどでも使用できます!
ボタンタグ
.btnクラスは、button要素で使用する前提で設計されていますが、aタグやinput要素でもつかう事ができます。
なお、コンテンツの折り畳みなどのトリガーとしてaタグを利用する場合はrole="button"を付与し、スクリーンリーダのような支援技術のためにその目的を適切に伝えましょう。

<a class="btn btn-primary" href="#" role="button">Link</a>
<button class="btn btn-primary" type="submit">Button</button>
<input class="btn btn-primary" type="button" value="Input">
<input class="btn btn-primary" type="submit" value="Submit">
<input class="btn btn-primary" type="reset" value="Reset">
アウトラインボタン
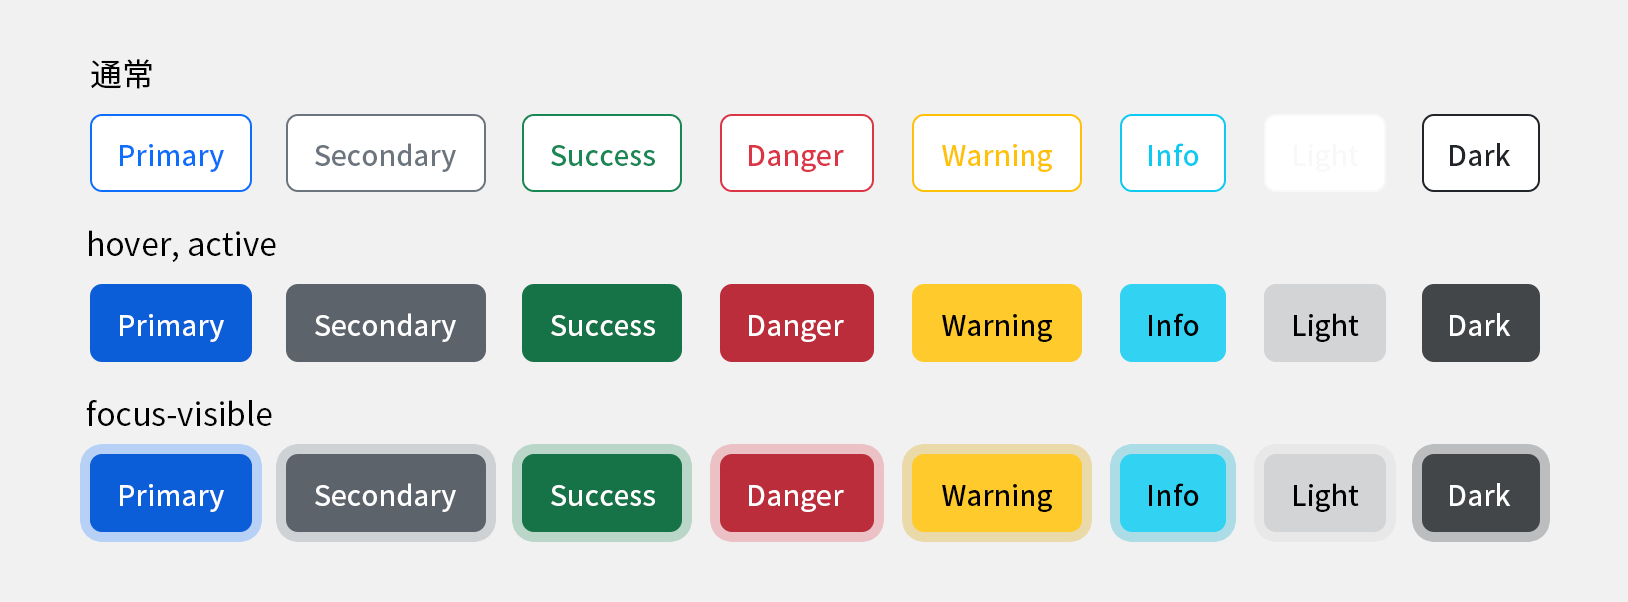
今まで紹介したbuttonには、アウトラインボタンというものが存在します。
これらは、.btn-outline-*に置き換える事で背景色を取り除くことができます。
なお、hover, active, focus-visible時は通常と同様です。
<button type="button" class="btn btn-outline-primary">Primary</button>
<button type="button" class="btn btn-outline-secondary">Secondary</button>
<button type="button" class="btn btn-outline-success">Success</button>
<button type="button" class="btn btn-outline-danger">Danger</button>
<button type="button" class="btn btn-outline-warning">Warning</button>
<button type="button" class="btn btn-outline-info">Info</button>
<button type="button" class="btn btn-outline-light">Light</button> //これは白背景だと見えない…
<button type="button" class="btn btn-outline-dark">Dark</button>非アクティブ状態(disabled)
ボタンを非アクティブに見せるには、<button>要素にdisabledを追加します。
無効化されたボタンにはpointer-events: noneが適用され、ホバーやアクティブな状態がトリガーされるのを防ぎます。

<button type="button" class="btn btn-primary" disabled>Primary button</button>
<button type="button" class="btn btn-secondary" disabled>Button</button>
<button type="button" class="btn btn-outline-primary" disabled>Primary button</button>
<button type="button" class="btn btn-outline-secondary" disabled>Button</button>aタグに対してdisabled属性をサポートしないので、.disabledクラスを付与しさらにaria-distabled="true"を追記します。またhref属性を含めないようにしましょう。

<a class="btn btn-primary disabled" role="button" aria-disabled="true">Primary link</a>
<a class="btn btn-secondary disabled" role="button" aria-disabled="true">Link</a>万が一無効化したaタグに対してhref属性が必要な場合は、aria-disabled="true"に加えてtabindex="-1"属性も追記します。これにより、キーボードフォーカスを受けないようにします。
<a href="#" class="btn btn-primary disabled" tabindex="-1" role="button" aria-disabled="true">Primary link</a>
<a href="#" class="btn btn-secondary disabled" tabindex="-1" role="button" aria-disabled="true">Link</a>
ブロックボタン
displayユーティリティとgapユーティリティを組み合わせて、Bootstrap4のような全幅の「ブロックボタン」のレスポンシブスタックを作成します。
ボタン固有のクラスの代わりにユーティリティを使用することで、間隔、配置、およびレスポンシブ動作を大幅に制御できます。

<div class="d-grid gap-2">
  <button class="btn btn-primary" type="button">Button</button>
  <button class="btn btn-primary" type="button">Button</button>
</div>
トグルの状態
data-bs-toggle="button"を追加すると、 ボタンクリック時に自動的に.activeクラスが付与されます。
事前に切り替える場合は、.activeクラスとaria-pressed="true"を追加して、スクリーンリーダーに適切に伝達されるようにする必要があります。

//マークアップ
<button type="button" class="btn btn-primary" data-bs-toggle="button">Toggle button</button>

//クリック時
<button type="button" class="btn btn-primary active" data-bs-toggle="button" aria-pressed="true">Toggle button</button>aタグの場合は、以下のように指定します。
//マークアップ
<a href="#" class="btn btn-primary" role="button" data-bs-toggle="button">Toggle link</a>
//クリック時
<a href="#" class="btn btn-primary active" role="button" data-bs-toggle="button" aria-pressed="true">Toggle link</a>
カスタマイズ
buttonの各部のカスタマイズも柔軟に行うことができます。
CSSで.btn-primaryを直接変更
以下は.btn-primaryに対して、紫系の色を指定してみた例です。
.btn-primary {
  color: #fff;
  background-color: #6f42c1;
  border-color: #5123a4;
}

.btn-primary:hover {
  color: #fff;
  background-color: #5123a4;
  border-color: #5123a4;
}

.btn-primary:not(:disabled):not(.disabled):active,
.btn-primary:focus {
  color: #fff;
  background-color: #5123a4;
  border-color: #5123a4;
}
.btn:focus-visible {
  color: #fff;
  background-color: #5123a4;
  border-color: #5123a4;
  outline: 0;
  box-shadow: 0 0 0 0.25rem rgba(111, 66, 193, .5);
}CSSの変数やSCSSをビルドすることでも、色の変更が可能です。
検証ツールや、実際のBootstrapのCSSファイル内を確認すると簡単に変更できると思います!
まとめ
Bootstrap 5のボタンは、デフォルトのスタイルに加えて、さまざまなバリエーションやカスタマイズが可能です。
記事で紹介した内容を参考に、ボタンをシンプルに使うだけでなく、アウトラインボタンや非アクティブ状態、トグルボタン、さらにはCSSでのカスタマイズによって、デザインや機能性を大きく向上させることができます。
- ボタンのバリエーションで、視覚的な意味合いやインタラクションを簡単に表現できます。
- アウトラインボタンや非アクティブ状態の設定で、ユーザーインターフェースにおけるアクセシビリティを向上。
- ブロックボタンやトグルボタンで、さらに柔軟なレイアウトや動作を実現。
Bootstrap 5のボタンは、フォームやインタラクションをより使いやすく、見栄えよくするための強力なツールです。カスタマイズの幅も広いため、プロジェクトに応じて柔軟に使いこなしていきましょう!
アイエムワークスでは、Bootstrap5を使ったWeb制作を得意にしています。
Bootstrap 5とBootstrap 4の主要変更点を比較
Bootstrap 4からBootstrap 5の主な変更点と、導入時に押さえておきたいポイントをまとめました。
Bootstrap5でモーダル実装【コードサンプルあり】
Bootstrap 5を使ったモーダルの実装方法。中央表示やスクロール対応、サイズ変更などオプションをサンプルコード付きで紹介!!
Bootstrap5でアコーディオン実装【コードサンプルあり】
Bootstrap5.3における「アコーディオン」の実装方法と、オプションの実装方法をサンプル付きで紹介いたします。

